Growing Kale Through the Winter

Our gardens may seem to be sleeping for the winter but hardy kales have been flourishing in the protection of our cold frame.

Installing a cold frame in your garden is the perfect way to extend your season and harvest fresh, healthy greens year round.

However, we do recognize that eating the same kale salad or stir fry can get old. Read to the end for a way to mix things up, courtesy of Deanna, creator of an incredible urban homesteading blog called Homestead and Chill.

Deanna may be in sunny California (actually her microclimate is very foggy, but she rarely has to deal with freezing temps!) but her garden can serve as inspiration to us all.

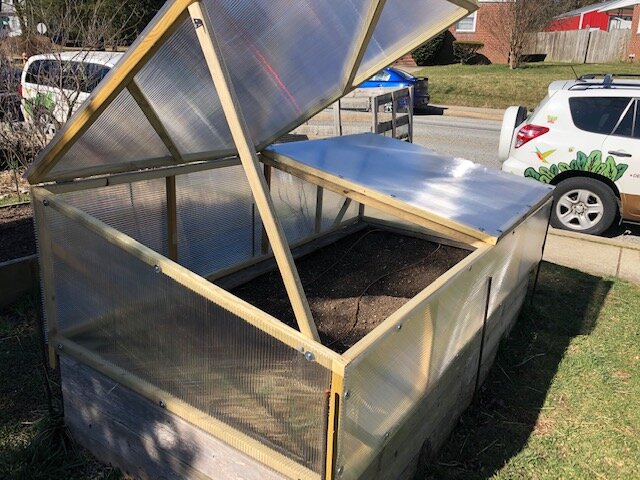
One of Edible Eden’s custom-built coldframes.

One of Edible Eden’s custom-built coldframes.

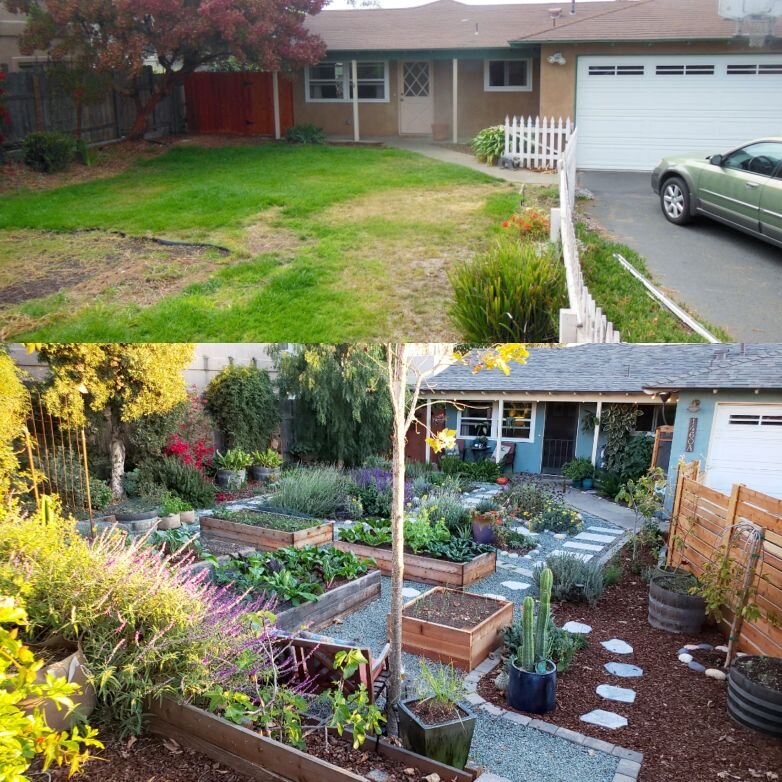
The Homestead and Chill front garden. Check out Deanna’s work on Instagram at @deannacat3 and her blog at homesteadandchill.com .

The Homestead and Chill front garden. Check out Deanna’s work on Instagram at @deannacat3 and her blog at homesteadandchill.com .

Check out this before and after photo of her front yard and click the image to see more - you’re definitely going to want to check out her full scope of raised beds, fruit trees, and pollinator gardens!

Go for the inspiring photos, but stick around for the recipes, gardening tips, and useful product recommendations.

Speaking of sticking around, thank you for sticking with me through that digression. Back to kale.

Kale is hardy down to temps of 20°F and even tastes sweeter after a frost; that’s thanks to the plant producing sucrose to act as a natural protective antifreeze.

Despite their frost tolerance, kale needs an extra boost of protection to succeed through our winters.

Our temps here in Baltimore usually do drop below 20°F at some point during the winter, although our recent winters have been fairly mild. A cold frame is an extra layer of protection to keep your plants alive during a deep freeze, but it also serves as more than just an insurance policy for the coldest of days.

Kale prefer to grow at temperatures between 50-70°F. In lower temperatures, they go dormant and wait for better conditions to grow. A cold frame can raise temperatures by about 10°F, keeping your kale growing longer in Fall and waking up more quickly in late Winter or Spring!

Your kale will likely still go through a dormancy in the dead of winter, but extending their growth through late Fall/early Winter will allow your plants to grow full enough that you can continue harvesting the existing large leaves until the plants wake up again soon in Late Winter or Early Spring.

Deanna’s recipe below is the perfect (and most delicious) use for mature tougher leaves.

One of Edible Eden’s custom-built coldframes.

One of Edible Eden’s custom-built coldframes.

Homemade Seasoned Crispy Kale Chips Recipe by Deanna of Homestead and Chill

You’re going to want to check out the full instructions on her blog through the link above for full instructions on how to use your food dehydrator or oven, but here is the ingredient list to get you started:

  • 1 large bunch of kale, or about a dozen large leaves

  • 1/2 to 1 full tablespoon of extra virgin olive oil for drizzling

  • Sea salt or your favorite seasoned salt, to your own taste

  • Deanna uses a number of different seasons to keep things interesting, including garlic powder, onion powder, curry or turmeric powder, black pepper, cumin, lemon powder, chili powder, everything-but-the-bagel seasoning, and nutritional yeast for a splash of umami flavor.

  • A strainer and mixing bowl, or a salad spinner

  • A food dehydrator, or oven and baking sheet

Deanna’s photo of her Homemade Crispy Kale Chips.

Deanna’s photo of her Homemade Crispy Kale Chips.

Spotlight on Goji Berry

Edible Eden’s resident Goji Berry plant is fruiting, and we thought it would be a fitting time to share some interesting facts about this edible plant!

The Goji Berry plant is a slightly thorny, deciduous woody shrub native to China. It can reach 12 feet tall but tends to droop (similarly to a weeping willow) and can easily be pruned for size. Goji Berry is a member of the Solanaceae family, also known as the nightshade family, which includes familiar plants like tomatoes, peppers, eggplants, and potatoes. Goji Berry is also known by several other names, including wolfberry, boxthorn, matrimony vine, or simply ‘Goji’.

The species of Goji that is most commonly used for fruit production is Lycium barbarum. However, there are a number of cultivated varieties that can be difficult to differentiate unless you buy a well-labeled plant from a reputable nursery. A related species, Lycium chinense, is said to produce rounder, sweeter berries, but is less commonly cultivated.

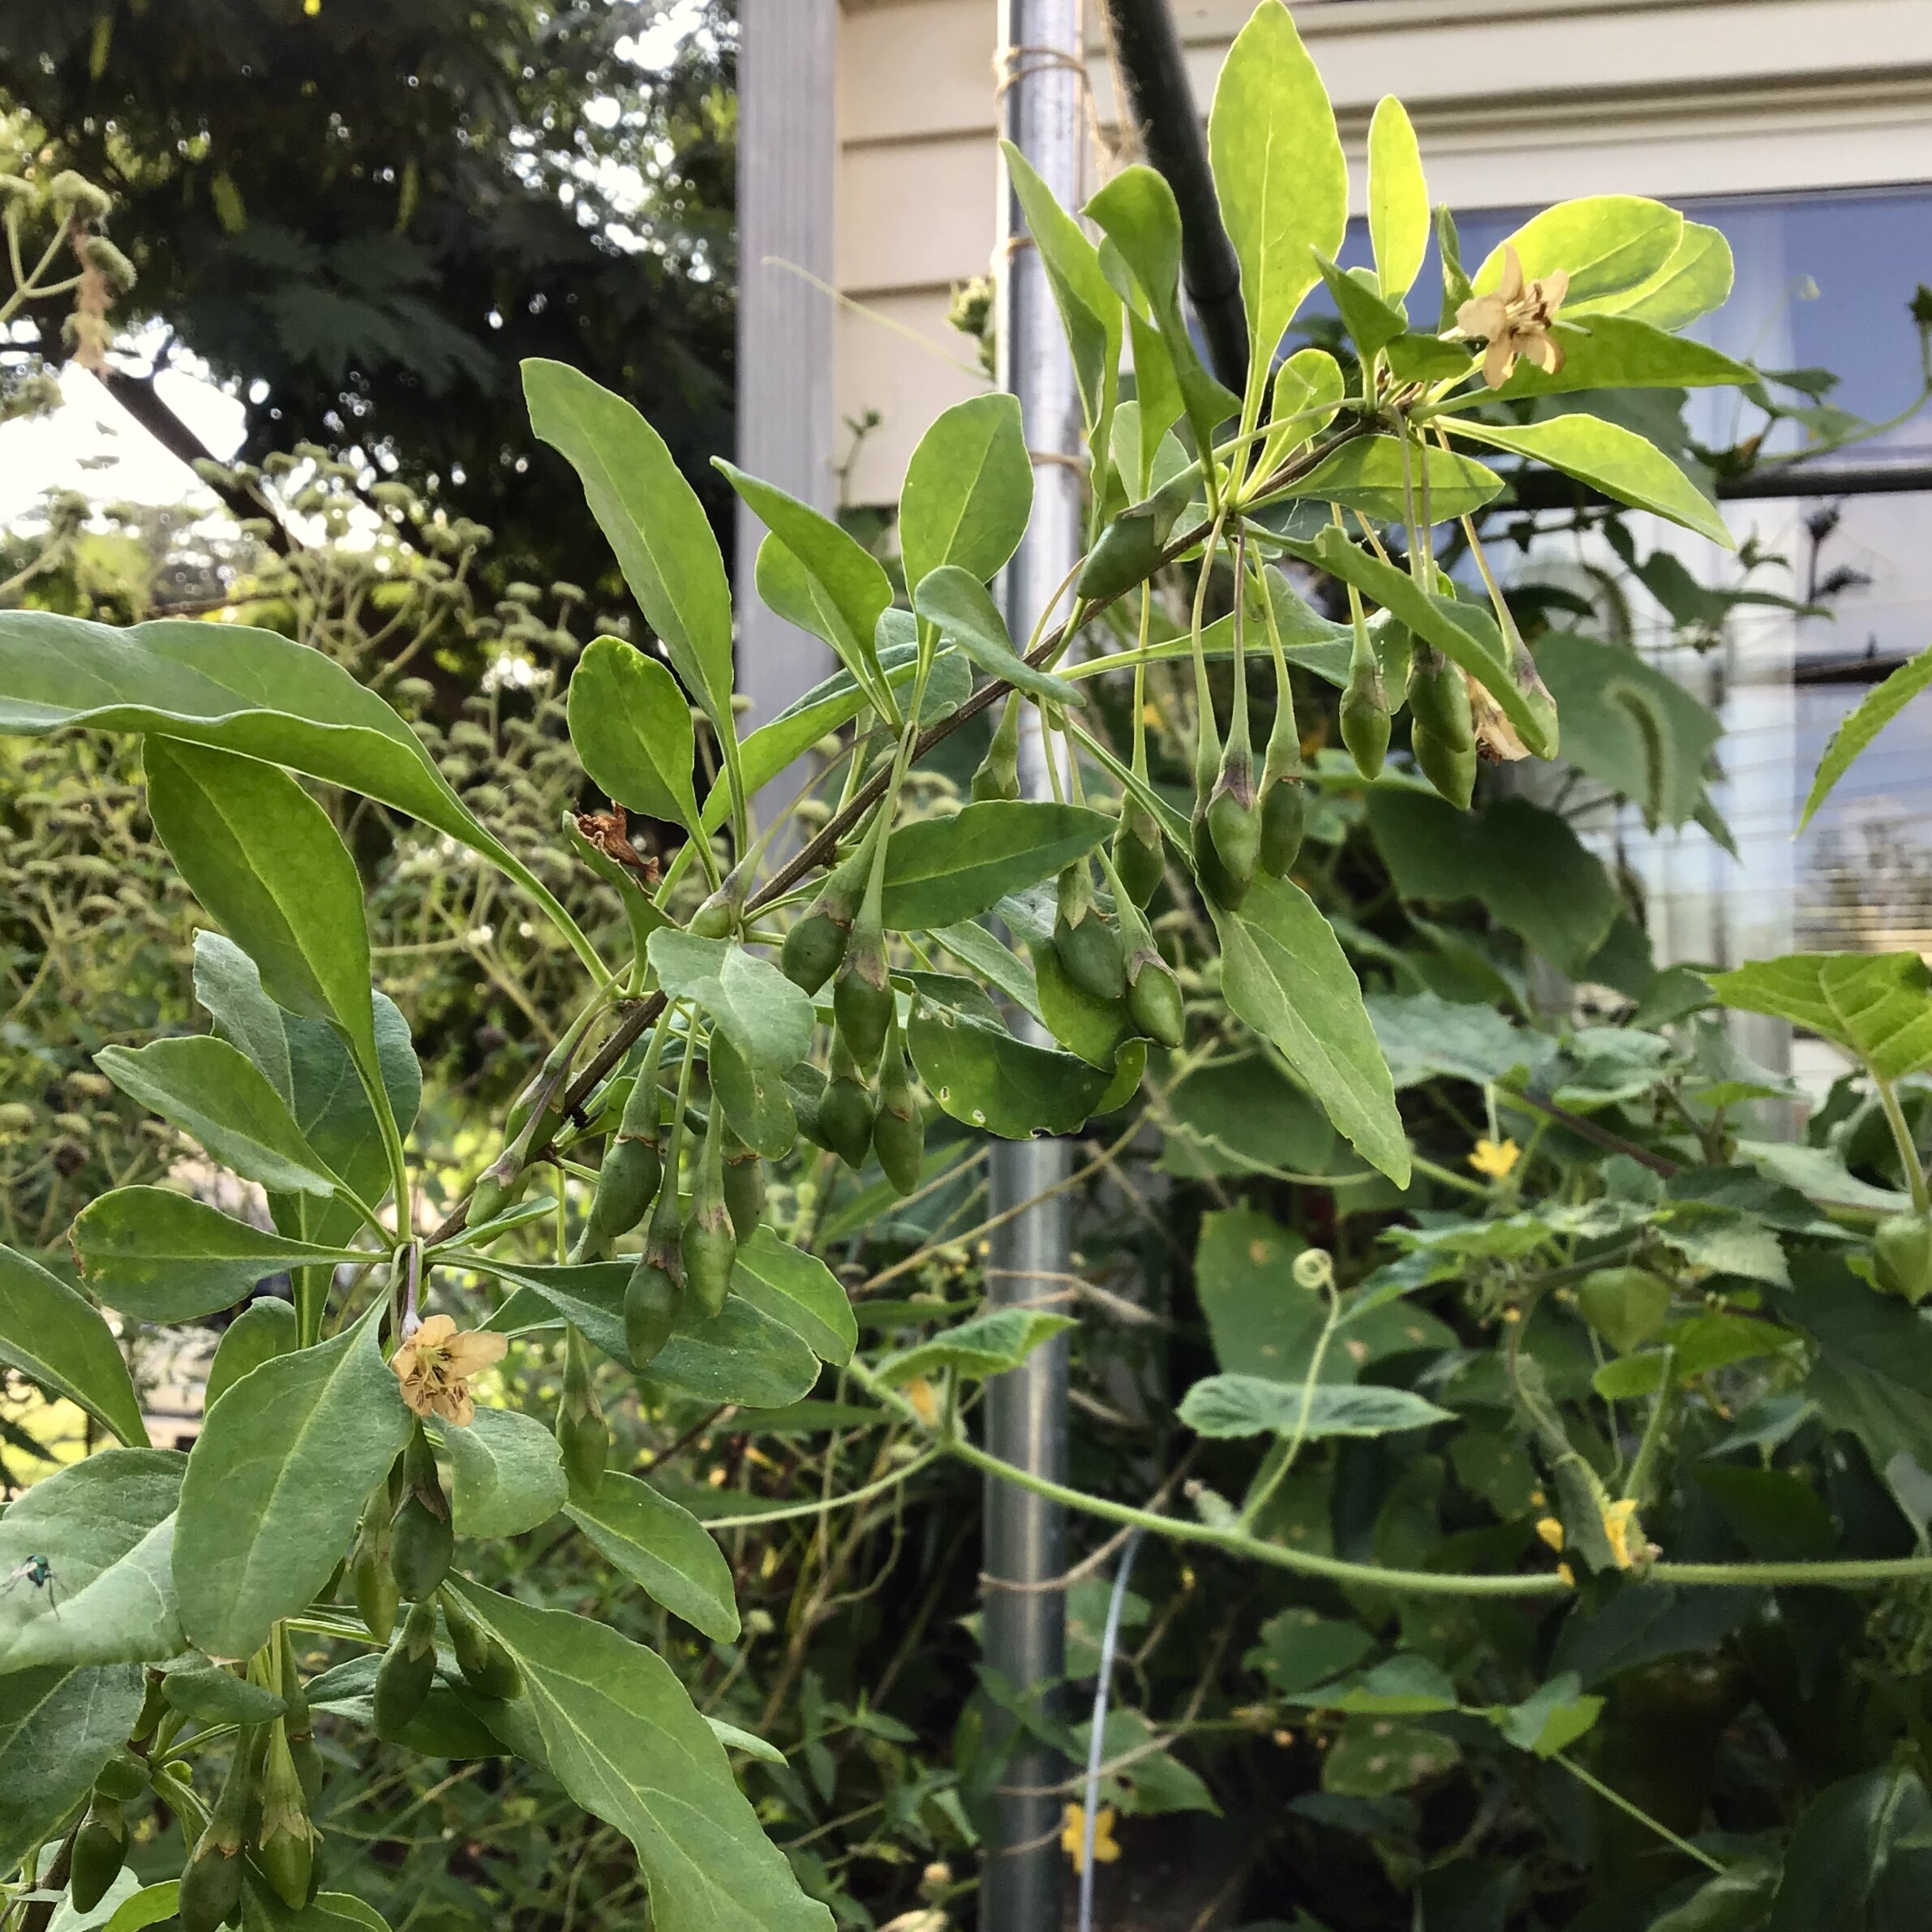
Edible Eden’s flowering and fruiting Goji Berry plant!

Edible Eden’s flowering and fruiting Goji Berry plant!

Growing Goji at home is fairly easy to do! Goji plants prefer fertile, loamy, well-drained soils with a neutral to very-slightly acidic pH. They are sensitive to high salinity in the soil and should not be planted near roadsides that may be salted during winter. However, Goji is very cold tolerant, surviving up to USDA zone 2. As long as your soil is not too heavy, wet, or salinified, Goji plants will grow vigorously; sometimes too vigorously! They will spread and may pop up in nearby areas of the garden, similar to raspberry brambles, and even have a similar cane-like structure.

Goji plants will begin to bear fruit relatively early, when the plant is only about 2 years old. If you are planting a nursery-grown transplant you will likely only have to wait until the following year for your first crop. Berry production will reach its maximum yield when the plant is about four to five years old. 

The fruit-bearing flowers form along the entire length of the current year’s stems. Similar to raspberries, the stems (or canes) that fruited in the previous year should be cut back to the ground. The main purpose of pruning Goji plants is to remove spent canes that will block light and airflow to the rest of the plant. It is best to let the new canes reach their full length, then cut the very tip. This will increase your yield by encouraging lateral branches which will also produce fruit.

While you can prune for size if you are working with limited space, cutting back the current year’s new stems will reduce your yield. A better, more aesthetically pleasing way to use the space would be to train the canes over an arbor trellis. You may need a small ladder to harvest some of  the fruit, but it keeps the area neat and really shows off the attractive red berries.

Now that you know how to grow Goji berries at home, maybe we should delve into just why you might want to do so! Goji berries are considered to be a “superfood” and have growing in popularity among health-conscious consumers. They can be particularly beneficial to vegan diets. The berries contain all 8 essential amino acids and are a surprisingly good protein source! There are about 4 grams of protein in every ounce of berries.

Goji berries are also rich in antioxidant compounds, and several preliminary studies have indicated that they can have positive effects on the aging process, energy levels, glucose control, immunomodulation, and more.

 
Unripe Goji Berries at Edible Eden’s HQ

Unripe Goji Berries at Edible Eden’s HQ

Because of their medicinal value, it is always best to check with your doctor before adding Goji to your diet, especially if you are pregnant or have any pre-existing conditions. Goji berries can interact with certain medications or autoimmune issues, and may cause unwanted uterine contractions during pregnancy. The berries are considered to be safe and beneficial for healthy consumers.

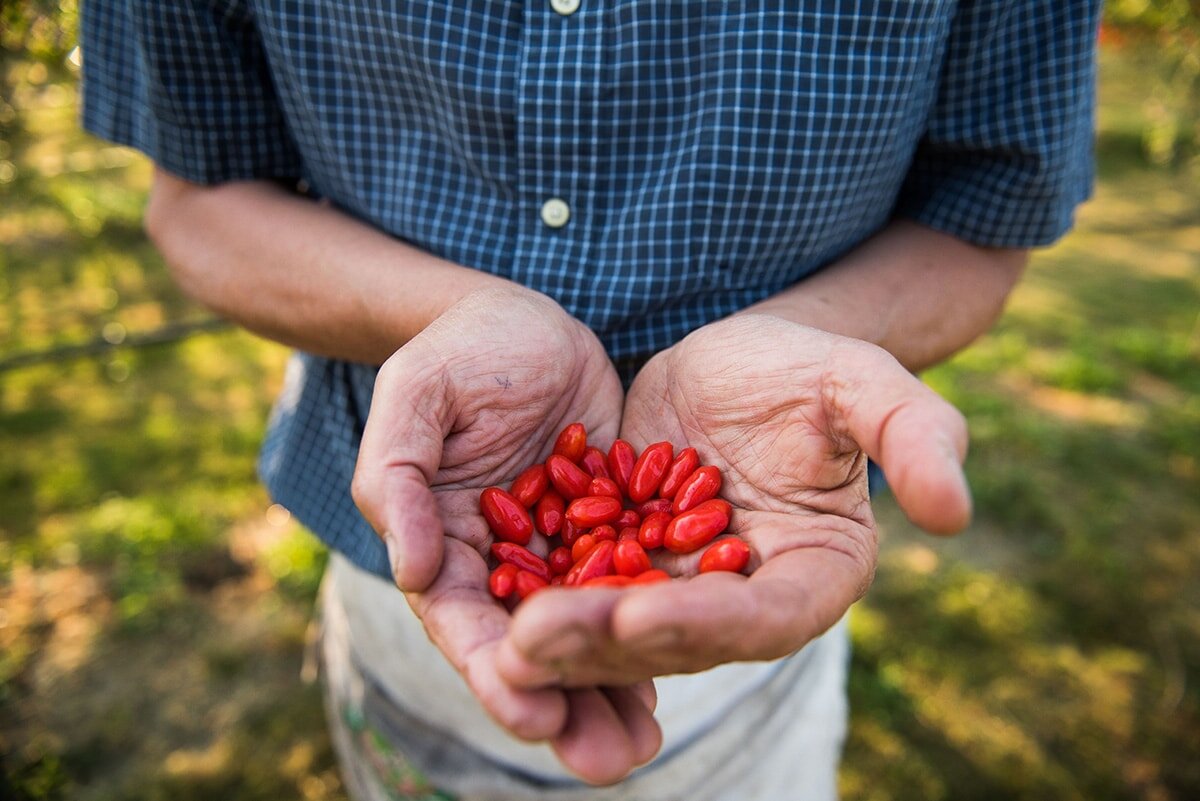
Image courtesy of Taves Family Farm: https://www.tavesfamilyfarms.com/goji-berries/

Image courtesy of Taves Family Farm: https://www.tavesfamilyfarms.com/goji-berries/

Enjoying the berries fresh off the plant is an acquired taste; they can be pretty sour or bitter. They are most often dehydrated and enjoyed like dried cranberries, perfect to add to a salad or trail mix. We also found the following jam recipe on the Plant Based Eats Youtube channel.

Plant Based Eats Goji Berry Jam Recipe:

Ingredients:

  • 1/2 cup of fresh goji berries. Or 1/4 cup of dried goji berries reconstituted in water for five minutes 1:1

  • 7 medjool dates

  • 2 tbsp of chia seeds

  • 1 tsp of beet root powder

  • 1 tbsp of lemon juice

  • 1/2 cup of purified water

Instructions:

  • Blend for 20 seconds. Refrigerate for 30 minutes.

  • Refrigerate leftovers. Will stay good for a few days.

  • Makes 1 cup of jam.

  • *The lemon not only adds flavor and nutrition, it helps to naturally preserve the jam.

Are you a longtime fan of this fascinating and health-packed fruit, or were you unfamiliar with Goji Berries before reading this article? Do you want help transforming your own yard into a beautiful and nourishing food forest? Click here to contact us!

Kitchen Sink Summer Salad

Summertime is fully upon us, and summer crops are ripe for the picking. Whether you’re harvesting from your own garden (if not, we can help change that!) or are frequenting your local farmer’s market, it is not a time of year that you want to miss out on.

What to do with all of the cucumbers and tomatoes? So many cucumbers and tomatoes… Eating them fresh off the vine is never a bad option, but maybe sometimes you want to mix things up.

 
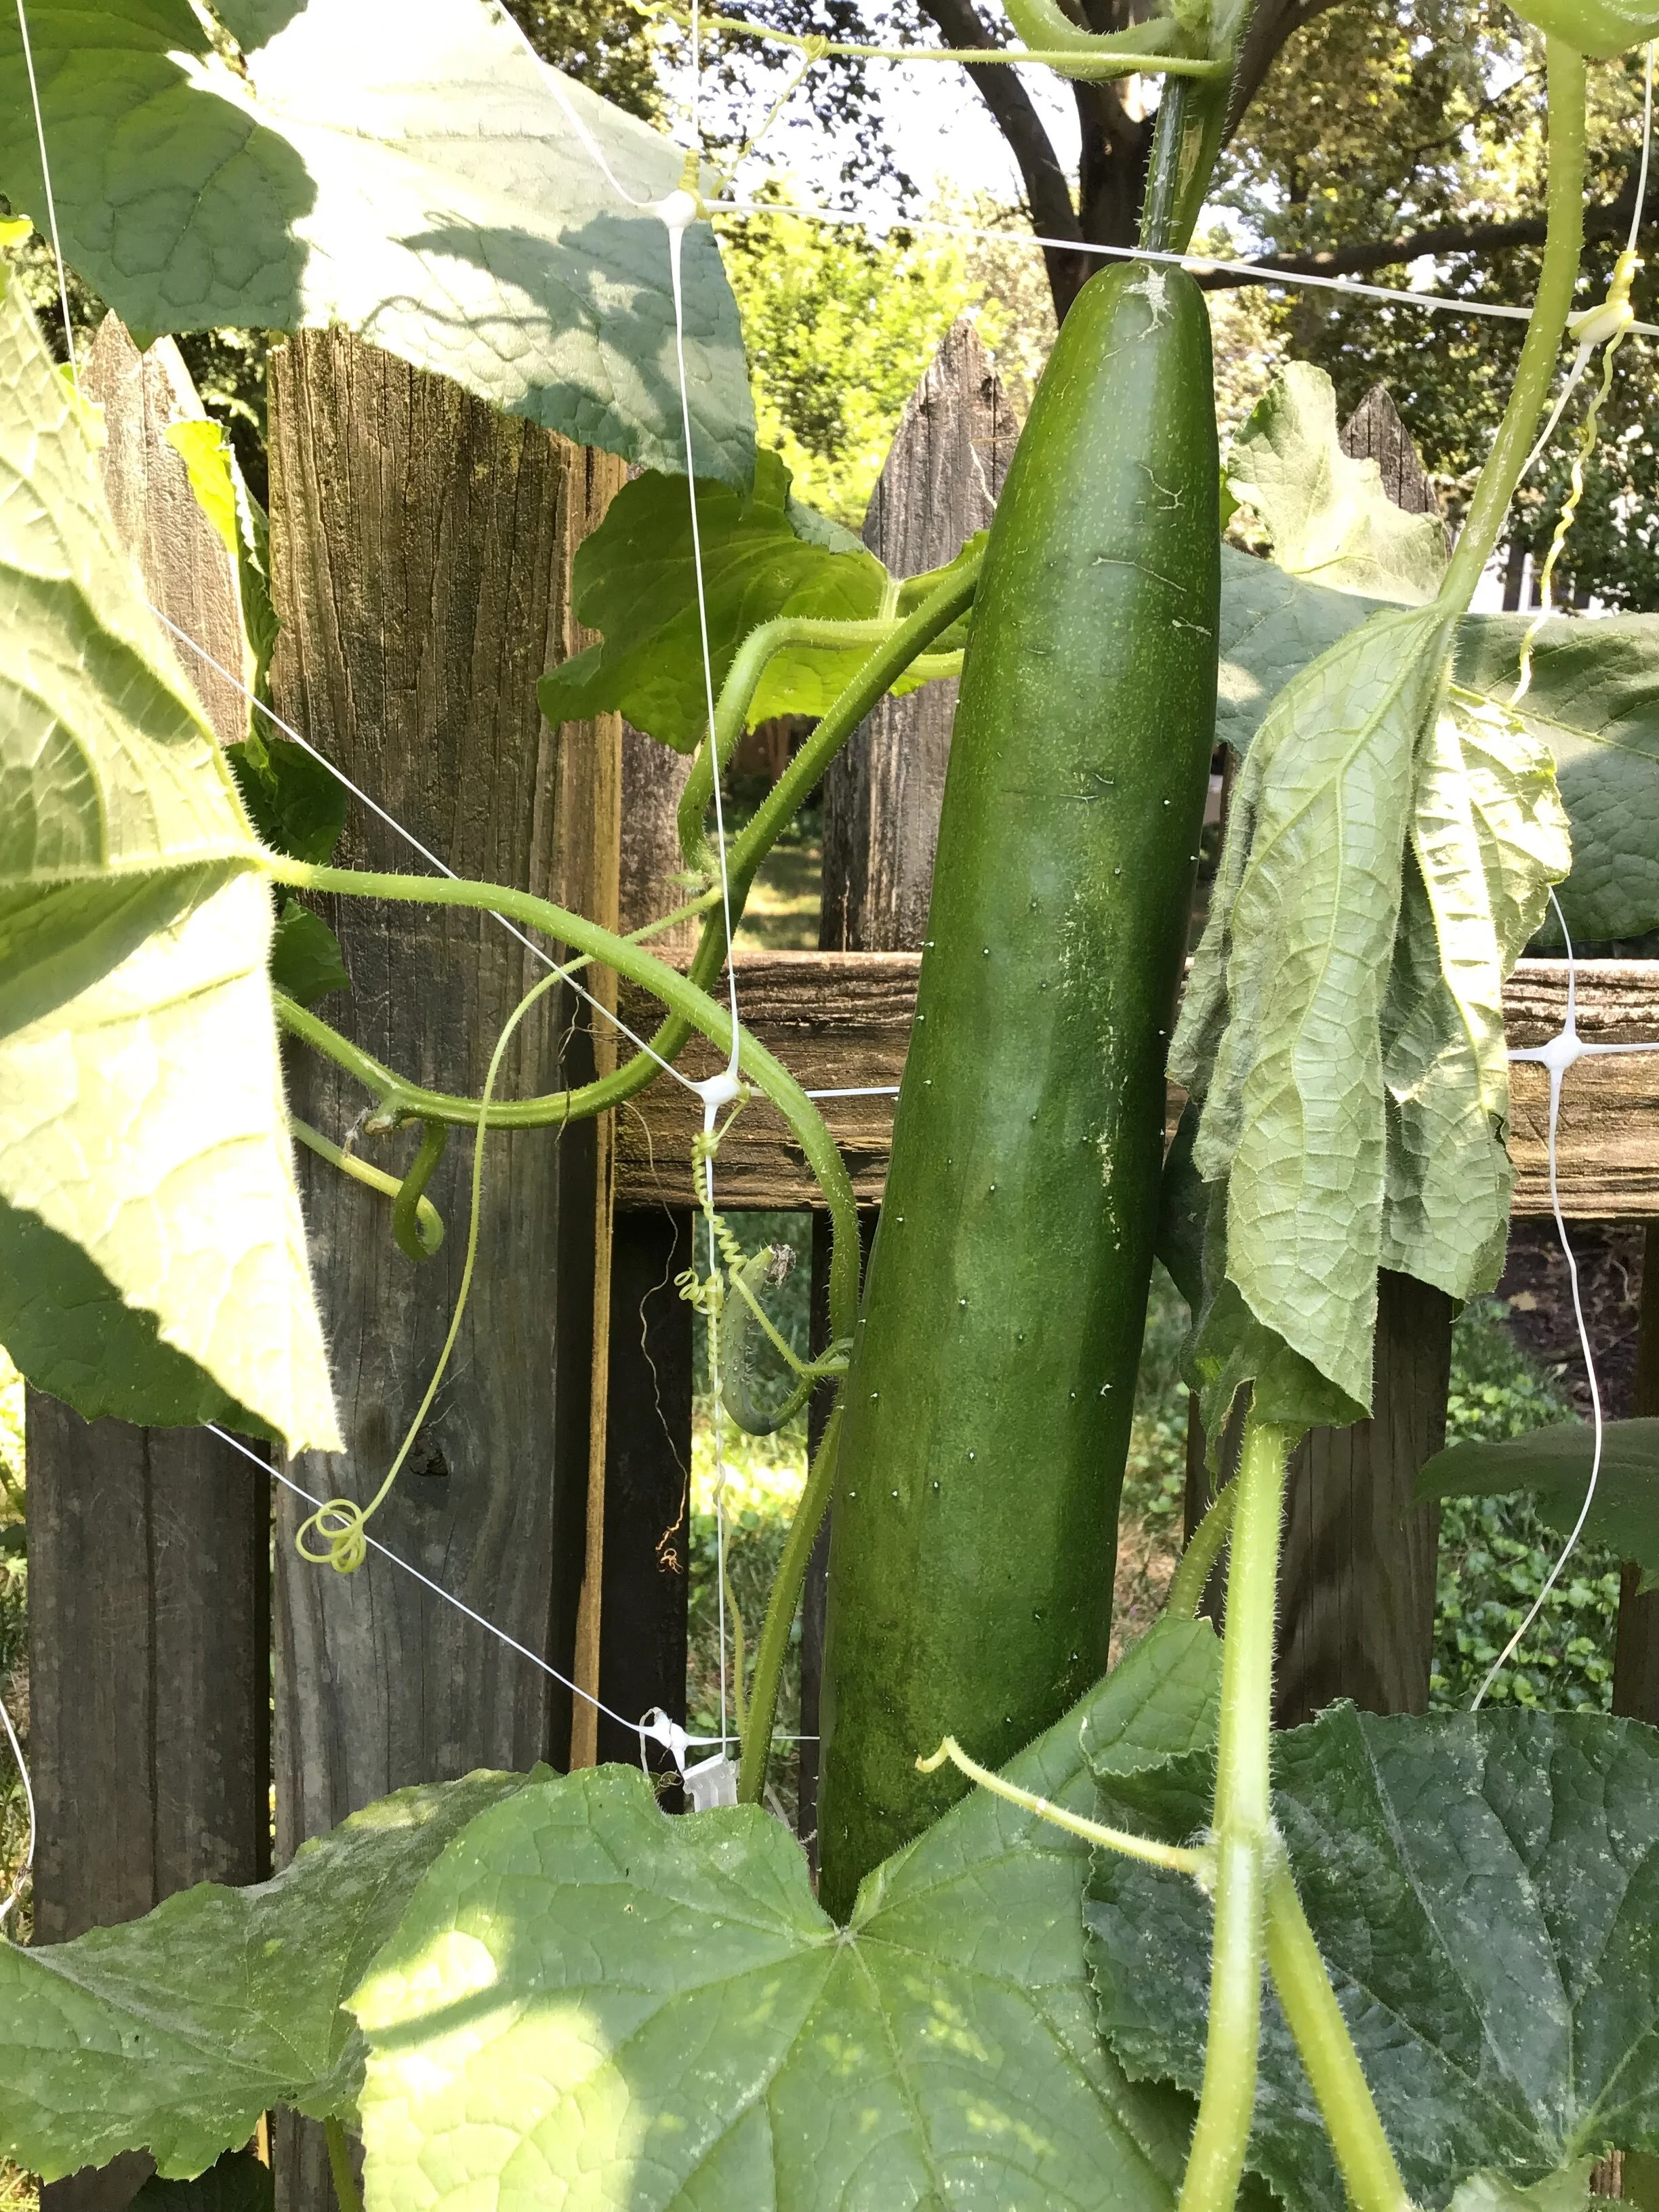
Summertime cucumber harvest.

Summertime cucumber harvest.


The Summertime-Harvest Kitchen Sink Salad recipe is here to help.

In full disclosure, this recipe is very easy. We promise that the fresh-from-the-garden flavor explosion won’t reflect the lack of effort.

Ingredients:

  • Greens of your choice (Swiss chard is a great summertime green that you can collect from your garden — skip the slimy, bagged grocery store greens!)

  • Cucumbers

  • Tomatoes

  • Peppers - hot and sweet both work!

  • Onion

  • Olive Oil

  • Salt and pepper

  • Garden herbs - basil, oregano, parsley, fennel, dill… whatever you have on hand!

  • Anything else from your garden! Carrots, baby beets, zucchini… anything but the kitchen sink.

  • Optional for Greek-inspired flavors:

    • Lemon

    • Olives

    • Feta cheese

Instructions:

  • Top your greens with your selected assortment of veggies, sliced any way you want them!

  • When your salad is fully assembled, toss or drizzle with your preferred combination of olive oil, salt + pepper, garden herbs, and optional Greek-inspired ingredients.

  • (Told you this was too easy.)

Slicing tips:

  • Cucumbers - slice into medallions OR slice lengthwise into quarters or smaller, then slice across the long pieces to make triangular, bite sized cuts

  • Tomatoes - cut cherry tomatoes in half, or dice larger tomatoes to the desired size

  • Peppers and carrots - slice lengthwise into slivers. Leave them that way, or dice into small squares

  • Onions and baby beets - dice or cut into strips, depending on preference (yes, you can eat raw beets, and they are extra good for you that way!)

More cucumbers!

More cucumbers!

 
Greek-Inspired Summertime-Harvest Kitchen Sink Salad. Can you spot Minka the Garden Dog sneaking in for a bite?

Greek-Inspired Summertime-Harvest Kitchen Sink Salad. Can you spot Minka the Garden Dog sneaking in for a bite?


"Big Flavor Broccoli"

Broccoli is sizing up here in Maryland and we are anticipating the big day when we get to harvest our broccoli heads! As we’ve been waiting, we’ve been searching for recipes for the big day and this recipe from Bon Appetit looks simple and delicious - what could be better?

INGREDIENTS

  • 1 lb. broccoli (about 1 large or 2 medium heads)

  • 5 Tbsp. extra-virgin olive oil, divided

  • Kosher salt

  • 1 small red onion, cut lengthwise into ½"-thick slices

  • 4 garlic cloves, sliced

  • 6 oil-packed anchovy fillets

  • 1 oz. Parmesan, finely grated (about ¼ cup)

  • Lemon wedges (for serving)

RECIPE PREPARATION

  • Preheat oven to 400°. Trim only the very bottom, woody part of broccoli stem. Peel tough outer layer from stem, from the florets down to the end of the stalk. Starting from stem end, cut broccoli at a 45° angle into ¾"-thick slices until you reach the florets. Break florets apart with your hands into bite-size pieces (this avoids getting bitsy trimmings all over the place).

  • Heat 3 Tbsp. oil in a large heatproof skillet over medium-high until shimmering. Add broccoli; season with salt. Cook, tossing occasionally, until broccoli is bright green and lightly charred, about 3 minutes. Transfer to a plate. Wipe out skillet.

  • Heat remaining 2 Tbsp. oil in same skillet over medium. Cook onion and garlic, stirring often, until onion is beginning to soften, about 3 minutes. Add anchovies and cook, breaking apart with a spoon, until broken down and garlic is beginning to turn golden around the edges, about 2 minutes.

  • Return broccoli to skillet and toss to coat with oil. Transfer to oven and roast, tossing once, until broccoli is browned and tender, 20–25 minutes. Wrap handle of skillet with a towel before you forget it’s REALLY HOT.

  • Scatter Parmesan over hot broccoli. Divide among plates. Serve with lemon wedges alongside.

 
20190612_113018+%281%29.jpg
 

Spring Greens Tortilla

Spanish tortilla or omelette is the easy-going cousin of the quiche. It makes a great light meal or entree, is delectable at room temp and as left-overs. Simple and quick to make, all that’s needed is a fair amount of eggs and some coordination!

image courtesy of www.bbcgoodfood.com/recipes/spanish-spinach-omelette

image courtesy of www.bbcgoodfood.com/recipes/spanish-spinach-omelette

Ingredients

  • 1 ¼ pounds potatoes, (about 4 medium) (you can also replace some or all with turnips, parsnips, celeriac, or other root veggies)

  • 1 medium onion

  • 3-4 packed cups of roughly chopped spring greens (spinach, arugula, bok choy, kale, etc)

  • 1 cup olive oil

  •  Salt and freshly ground black pepper

  • 6 extra-large or jumbo eggs

Instructions

  1. Blanche greens - Bring a pot of water to a boil, drop greens in, cook for a minute or until bright green, then transfer to a bowl of iced water. Remove from water and squeeze to remove excess moisture.

  2. Heat 1/2 cup of olive oil in an 8 or 10 inch nonstick skillet over medium heat.

  3. Peel and thinly slice potatoes and onions (and any other root veggies you may be using). Drop a potato slice in the oil to test the heat. When it starts bubbling, add potatoes, onions, a pinch of salt and pepper. Gently stir and turn with a wooden spoon and adjust the heat as necessary to keep oil slowly bubbling.

  4. Turn potatoes every few minutes, do not allow them to brown or break. Remove potatoes and onions, draining and reserving the oil, when potatoes are tender and easily pierced.

  5. Wipe out skillet, and heat over a medium flame for a minute. Add 2 tablespoons oil. Gently mix warm potatoes with eggs and greens, and add to skillet. As soon as edges firm up, after a minute or so, reduce heat to medium-low. Cook 5 minutes.

  6. Insert a rubber spatula all around edges of tortilla to loosen. When the edges are firm and the top and middle are slightly cooked, cover the skillet with an upside down plate. Holding it firmly, flip the tortilla quickly onto the plate. Add another tablespoon oil to skillet, and use the spatula to coax tortilla back in. Cook 5 minutes, then slide from skillet onto a clean plate. Serve warm (not hot), or at room temperature.

IMG_0519+%281%29.jpg
20190821_121232.jpg

Beet and Citrus Salad

Around this time of year, I find myself getting tired and weighed down by heavy Winter meat-and-potato meals. My body is ready for Spring and craves fruits and veggies, and lots of them. But, of course, it’s still Winter. Fresh and local produce is limited!

Luckily, I’ve found a remedy - a Winter salad that is the perfect mix of in season and long storage crops and tangy (not-so-local, but certainly seasonal!) citrus. Hearty and filling from roasted beets, the zing of the citrus still picks me up and leaves me feeling fresh. Want to make this an entree rather than a side dish? Serve it on top of a bed of grains!

Winter Beet and Citrus Salad

Light St Produce - beets.jpg

For the Salad

  • 5 medium beets

  • 1 medium-large bulb fennel

  • 2 large stalks celery

  • 1 small shallot

  • 2 or 3 pieces of citrus - blood oranges, cara cara oranges, mandarins, and grapefruit all make great choices!

  • ½ cup coarsely chopped herbs - whatever leafy herbs you have on hand. Parsley, cilantro, and mint are all perfect!

  • 2 cups loosely packed arugula (optional)

For the Dressing

  • 3 tbsp Extra-virgin olive oil

  • 2 tbsp white wine vinegar (or other light vinegar of choice)

  • 2 tsp honey

  • 2 tsp fresh lemon juice

  • Salt and pepper to taste

Instructions

  • Preheat oven to 400

  • Scrub beets well, slice into ¼” - ½” medallions, toss with a drizzle of olive oil (enough so they are coated but not saturated) and a pinch of salt. 

  • Roast beets for 25 minutes, turning once, until they are easily pierced with a fork. Set aside to cool. 

  • While you wait, slice fennel and celery along the diagonal into long, thin slices. Thinly slice the shallot. Cut or pull citrus into segments (it’s okay if they are messy).

  • Mix dressing ingredients with a whisk or fork until fully emulsified.

  • Assemble salad, drizzle dressing on top, toss gently to mix, and serve!

Garden Herb Shortbread Cookies

lemon+and+herbs2.jpg

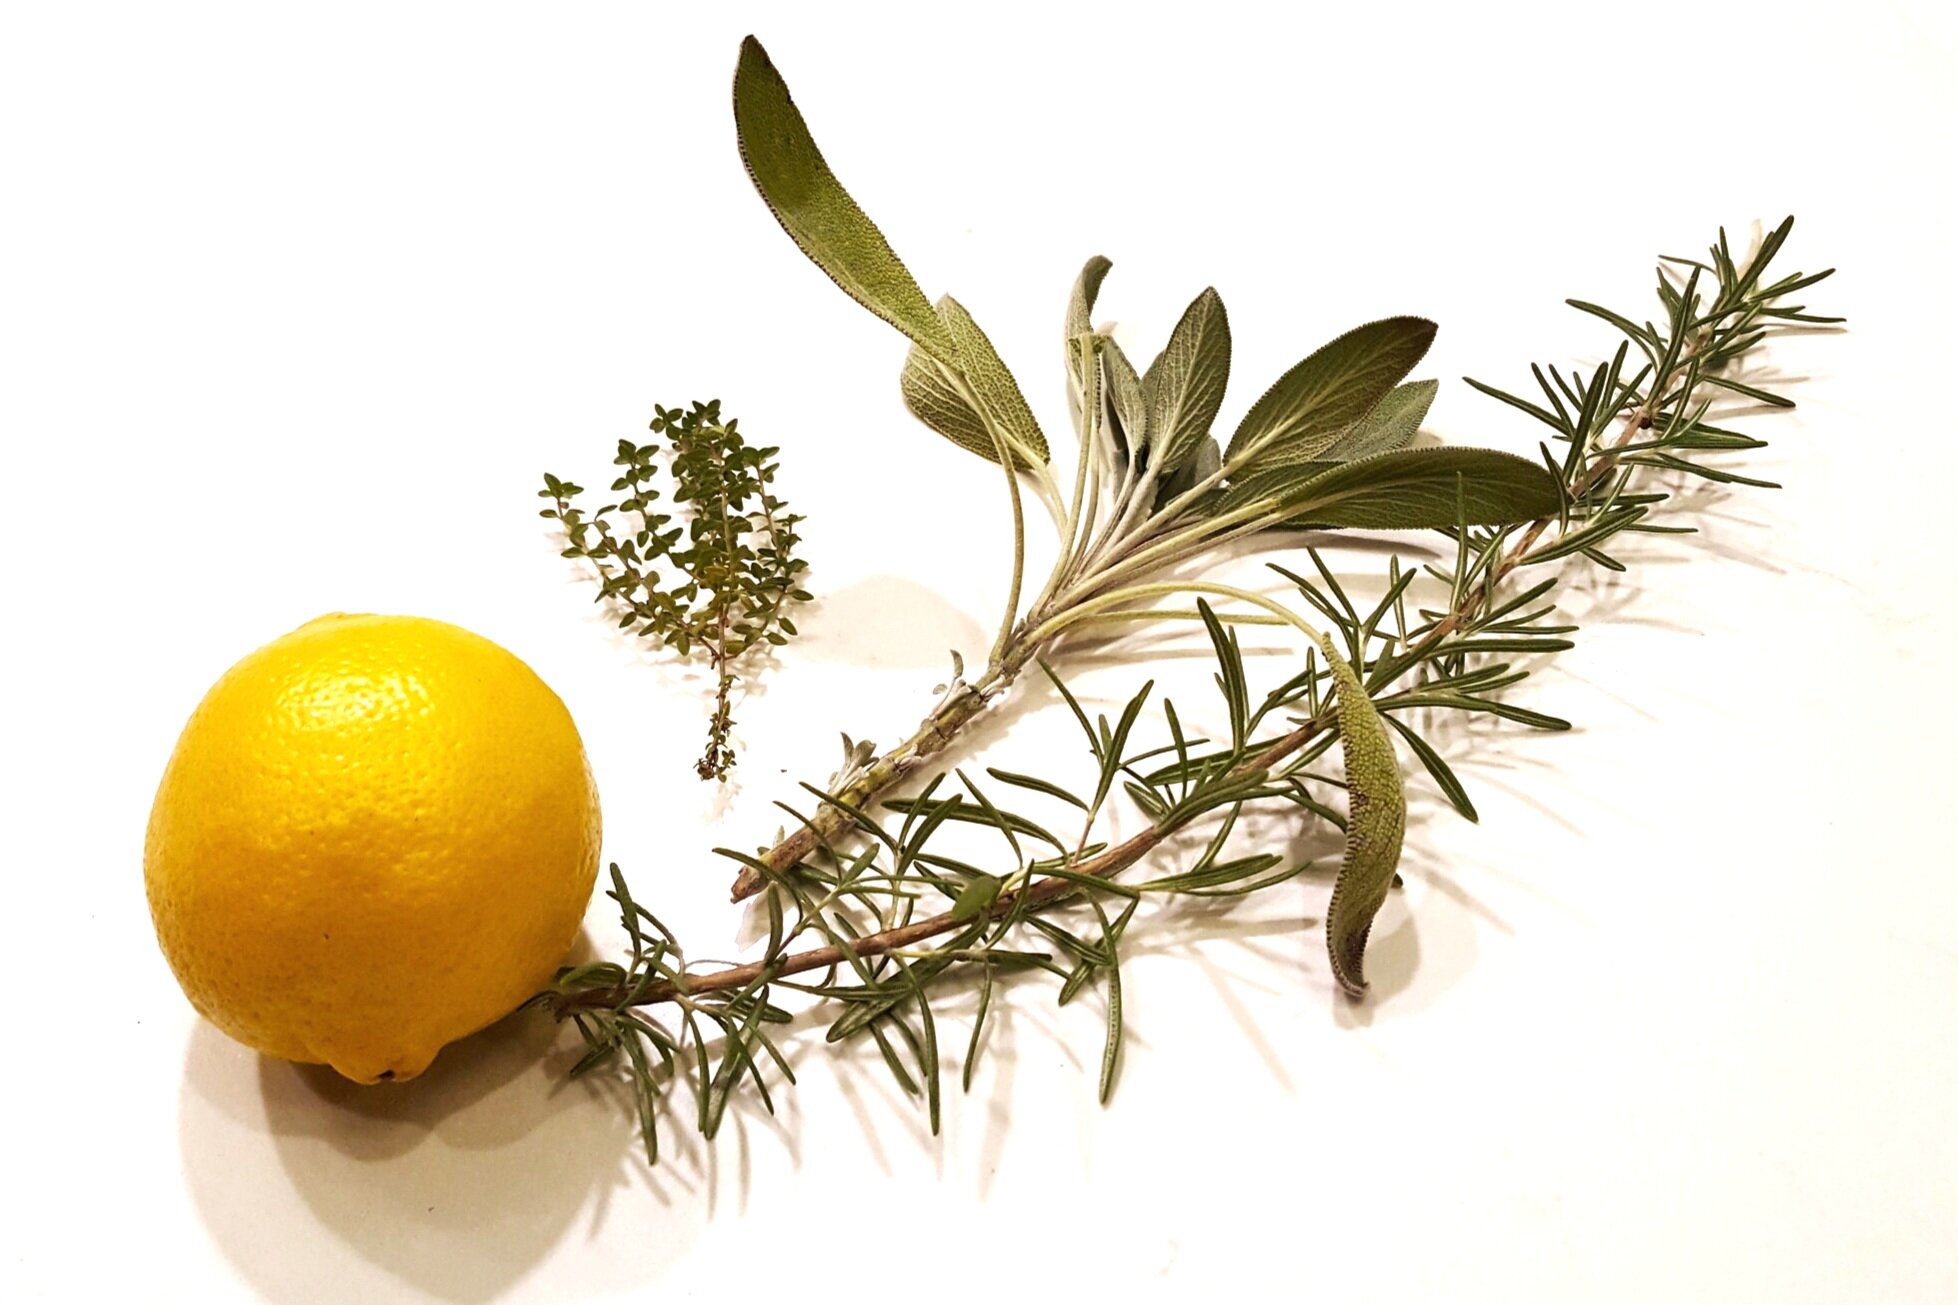
Want to stand out at this year’s cookie exchange? Longing for the flavors of your garden? Pull those dried herbs out to add a twist to a classic shortbread cookie for a simple but unexpected recipe. This is the perfect treat to enjoy with some hot herbal tea on a cold winter day while dreaming of the summer garden....

Some possible flavors: thyme, lemon-thyme, lavender, rosemary, sage, tarragon, anise-hyssop 

Add these on their own or in combinations with one another or with lemon, lime, or orange zest


Ingredients

  • 1/2 cup (1 stick) unsalted butter, softened at room temperature

  • 1/4 cup powdered sugar

  • 1/2 teaspoon vanilla extract (optional)

  • 1 cup all purpose flour

  • Generous pinch of coarse kosher salt

  • 1 tablespoon of finely chopped herb of choice 

  • 1 tablespoon of citrus zest of choice (optional)


Directions

  • Cream butter and powdered sugar until smooth

  • Beat in any citrus zest, chopped herbs, and vanilla extract as desired

  • Mix in flour and salt until just combined

  • Transfer dough to a large piece of plastic wrap, roll out into a disk, cover with a second sheet of plastic wrap and continue to roll out to 1/4th inch thick disk. Chill for 20-30 minutes.

  • Preheat oven to 350

  • After chilling, cut dough into desired shapes with knife or floured cookie cutter

  • Place on parchment lined baking sheet and bake for 15 minutes or until golden brown

Seasonal Recipe: Squash and Bean Minestrone

The perfect transitional dish from Bon Appetit, this veggie heavy soup is fresh enough for a late Summer night but hearty enough to warm you up on a crisp Fall day. 

Note: the original recipe calls for ham hock and chicken broth. We’re adapting it for our vegetarian friends, but you can find the link to the Bon Appetit version here.


Image and recipe courtesy of bonappetit.com

Image and recipe courtesy of bonappetit.com

INGREDIENTS

  • 1 pound dried navy or cannellini (white kidney) beans

  • ¼ cup plus 2 Tbsp. olive oil plus more for drizzling

  • 1 large onion, finely chopped

  • 2 leeks, white and pale-green parts only, finely chopped

  • 2 small celery stalks, chopped

  • 2 cloves garlic cloves, finely chopped

  • 1 butternut squash, peeled, cut into ½” pieces

  • 1 pound green beans, trimmed, cut into 1” pieces

  • 8 cups vegetable broth

  • 1 pound small pasta (such as tiny shells or pipette)

  • 1 cup chopped fresh flat-leaf parsley, divided

  • 2 bunches flat-leaf spinach, thick stems removed

RECIPE PREPARATION

  • Place navy beans in a large pot; add cold water to cover by 2”. Bring to a boil, reduce heat, and simmer 2 minutes. Remove from heat, cover, and let stand 1 hour.

  • Heat ¼ cup oil in another large heavy pot over medium-low heat. Add onion, leeks, celery, and garlic; season with salt and pepper. Cook, stirring occasionally, until vegetables are softened, about 20 minutes.

  • Add squash, green beans, navy beans (with soaking liquid), and broth, to pot. Bring to a simmer over medium heat; reduce heat to low, cover, and gently simmer until navy beans are tender, 1½–2 hours.

  • When soup is almost finished cooking, cook pasta in a large pot of boiling salted water, stirring occasionally, until al dente. Drain and transfer to a large bowl. Drizzle with 2 Tbsp. oil.

  • Add spinach and parsley to soup. Divide soup into bowls and add pasta.* Enjoy!

*If storing soup, be sure to store pasta and soup separately, always adding pasta just before serving. This will keep the pasta from getting soggy. 


Seasonal Recipe: Falafel Spice Tomato Flatbread

As a final goodbye to vibrant Summer produce, we’re savoring this flavorful and seasonal flatbread from Bon Appetit. Do justice by those final ripe tomatoes, the last of your crisp cucumbers, and that medley of aromatic garden herbs one last time before next Summer. 

INGREDIENTS

  • Flat bread, naan, or pocketless pitas (original recipe includes instructions, but you can use store bought, too!)

Tomatoes and Chickpeas

  • 2 garlic cloves, finely chopped

  • 1 teaspoon sumac (if unavailable, you can substitute lemon zest)

  • ½ teaspoon each of crushed red pepper flakes, ground coriander, and ground cumin

  • 1 teaspoon kosher salt

  • 2 large heirloom tomatoes, any color, thinly sliced

  • 1 15.5-ounce can chickpeas, rinsed

  • 2 tablespoons red wine vinegar

  • 1 small shallot, thinly sliced

  • ½ cup parsley leaves

  • 3 tablespoons olive oil

Yogurt Sauce

  • 1 Persian cucumber, peeled, chopped

  • ¾ cup plain yogurt

  • ½ cup each of coarsely chopped fresh mint and parsley

  • Hot sauce

RECIPE PREPARATION

Tomatoes and Chickpeas

  • Combine garlic, sumac, red pepper flakes, coriander, cumin, and 1 tsp. salt in a small bowl. Arrange tomato slices in a single layer on a rimmed baking sheet and sprinkle garlic mixture evenly over top. Let sit at room temperature at least 30 minutes and up to 1 hour.

  • Toss chickpeas and vinegar in a medium bowl; season with salt and pepper. Mash chickpeas with a fork until about half are smashed. Add shallot, parsley, and oil and toss to combine; season with salt and pepper. Set aside.

Yogurt Sauce

  • Combine cucumber, yogurt, mint, and parsley in a medium bowl; season with hot sauce, salt, and pepper. Let sit at room temperature at least 15 minutes.

Assemble

  • Top each flatbread with yogurt sauce, chickpea mixture, and tomatoes. Drizzle with more oil and season well with salt and pepper.


Refreshing Summer Drinks

Staying hydrated and refreshed in the midst of the August heat can be a chore. While an ice cold soda may quench your thirst initially, it’s ultimately dehydrating and chock full of sugar. Meanwhile, drinking enough water to replenish oneself (especially when you spend a lot of time outside like we do!) can be daunting. This month we’ll give you some ideas for healthy, hydrating, and refreshing options straight from your garden.

Read more

Seasonal Recipe: Gazpacho

Summer in Baltimore: the sun is out, your garden is full of produce, the heat and humidity weigh on you ‘til you can barely stand up! It’s hard to think about cooking at all when it’s so hot, let alone turning the oven on!

Lucky for you, this month we have the easiest, most refreshing, heat-free recipe possible - AND it showcases all of your favorite Summer veggies! 

Read more

Garlic Scapes

20190529_160813.jpg

It’s been over 6 months since you’ve put your garlic in the ground. Maybe you’re tired of the patch of straw reserved for garlic that could be full of tomatoes right now. Don’t get discouraged!

Just about now, your garlic will form scapes - what is a garlic scape and why should you be excited? A garlic scape is the long, curly shoot sent from the top of the garlic leaves to hold the garlic flower. For our purposes, we want to cut the garlic scapes before they flower. This helps the plant redirect energy to forming a bulb rather than forming a flower and seeds. But that’s not the only reason we pluck off the scapes -- they’re delicious! Enjoy their garlic-y flavor raw, cooked, pickled, or grilled. Really, they’re delicious in anything.

Need some garlic scape inspiration? Try these:

Grilled or Roasted Scapes

One of the simplest and purest ways to enjoy garlic scapes is simply tossing them in olive oil, sea salt, and fresh pepper and throwing them on the grill or in a 400 degree oven until golden brown on the outside and just tender on the inside. Be sure to flip them halfway through to cook both sides.  The garlic flavor is mild, sweet, and tangy - the perfect side for your Summer barbecues.

Sauteed Scapes with Lemon

Looking for something slightly more refined? Cut the scapes into 2 inch spears and toss into a pan over medium heat with a pat of butter. Sautee until bright green and just tender, add a splash of water (2 tablespoons or so should do) and cover the pan with a lid. Cook for another 2 minutes. Remove from heat, top with sea salt, fresh pepper, and a squeeze of lemon. Serve with fish or on top of rice.

Garlic Scape Pesto

Feeling like a garlic scape pro? Try making pesto to slather on your pasta or chicken.

You’ll need:

1 cup garlic scapes, sliced crosswise (about 10 to 12 scapes)

¼ cup raw sunflower seeds, pine nuts, or walnuts

½ cup extra virgin olive oil

¼ cup Parmesan cheese

½ cup basil leaves

Juice of one lemon

 Pulse the garlic scapes in a food processor for 15 seconds. Add ingredients in order, processing for another 15-30 seconds after adding each. Once everything has been added, process until pesto reaches desired consistency. If it’s too thick, add more olive oil. Add salt and additional lemon juice to taste.


Chickweed Pesto

 
20190415_175554+%281%29.jpg

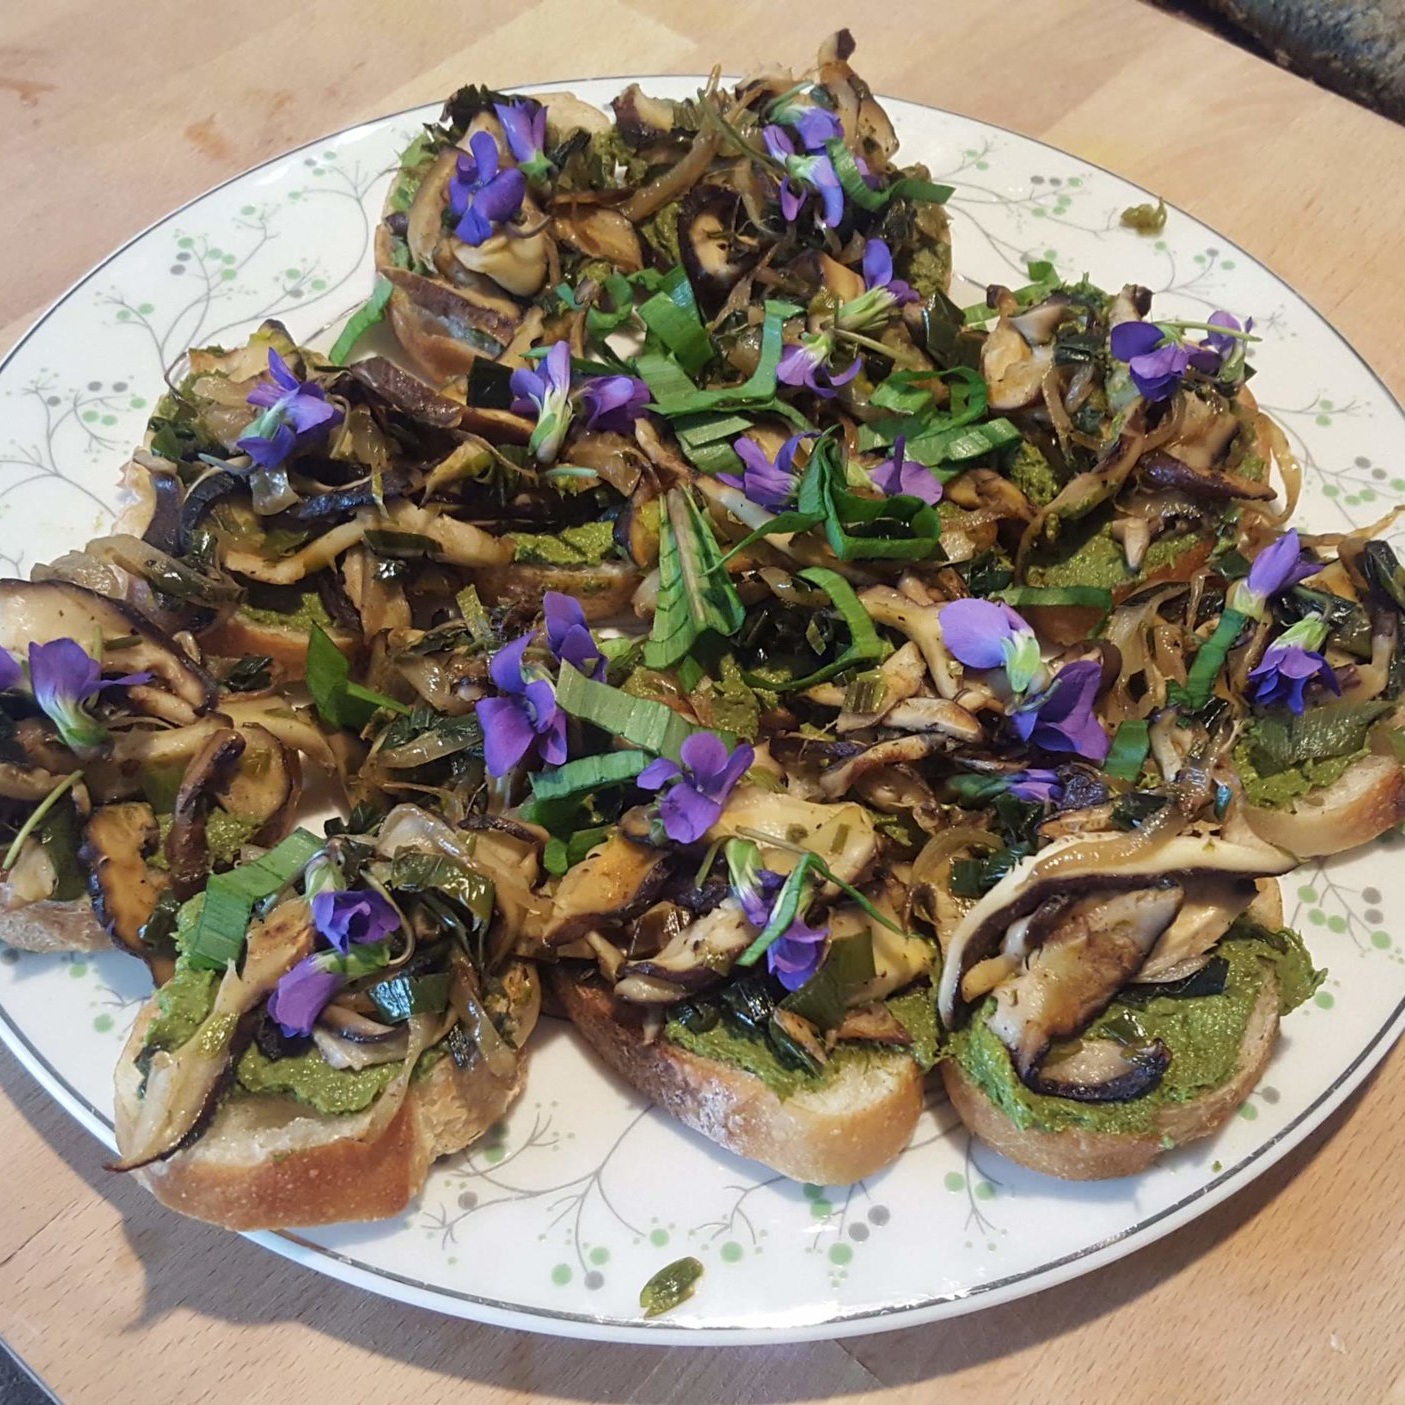
Last month, our team celebrated the Spring season by getting out of the garden and learning about edible wild plants! Our operations manager, Brody, invited us to visit his property and learn about the abundance of food growing there (both cultivated and wild). Among the “weeds”, we found chickweed, nettles, watercress, garlic-mustard, and violets - all of which are edible and have unique, delicious flavors. We enjoyed the medley of greens sautéed with some of Brody’s home grown Shiitakes and he graciously supplemented the bounty we collected with some chickweed pesto that he had made a few days earlier.

We loved the pesto so much that we thought we’d share it here - so go grab a few handfuls of chickweed from the backyard (or woods, or farmers market) and let’s get cooking!

Ingredients

  • 1/2 cup walnuts, cashews, or pine nuts

  • 2-3 cloves garlic minced

  • 3 cups chickweed loosely packed

  • 1 Tbsp lemon juice

  • 1/2 cup extra virgin olive oil

  • 1/2 tsp salt

  • 1/4 tsp freshly ground black pepper

  • 1/4 cup freshly grated Parmesan cheese

Instructions

  1. Place all ingredients into a food processor and process until smooth. (A blender can be used instead, but the chickweed should be finely chopped first)

  2. If it's too thick, slowly drizzle in a bit more olive oil.

  3. Keep refrigerated. Eat or freeze within 3-4 days.

This recipe is courtesy of www.growforagecookferment.com


Ramping up for Spring

Ramps, or Wild Leeks, are wild edible plants in the allium family. Growing natively in the Appalachian mountains from Canada to North Carolina, ramps only appear for a few weeks before going to seed and disappearing for the Summer. As the first green to appear in early Spring, ramps have historically been celebrated as a sign of Spring and a tonic to the traditional Appalachian meat-heavy Winter diet.

Read more

Garden to Table Recipe

Simple Roasted Vegetables


3-5 Fennel bulbs, trimmed and sliced into 1 inch slices.
1 large Celeriac, peeled and sliced into 1/4 inch slices
2-3 turnips, peeled and sliced
Broccoli broken into flowerettes
Olive oil
Salt and pepper


Never underestimate the ability of a little bit of olive oil, salt and pepper and 45 minutes or so in a hot over to transform lesser known (or loved) vegetables into something you will need to beat the kids off with a rolling pin if there are to be any left for dinner!

Some of my favorites are fennel, celeriac and turnips as well as old stand bys like broccoli and cauliflower.
Preheat over to 425. Cut your vegetables into distinctive bite size pieces, put in a bowl and drizzle with olive oil, Salt and pepper. Toss to coat. Arrange on a sheet tray. Bake for 30-45 minutes, depending on the vegetable, until crispy around the edges and soft in the middle. Fennel in particular takes a good long while to turn all soft and caramelized but believe me…it’s worth the wait.

To finish it off, sprinkle with parmesan cheese and bake for an additional 10 minutes. Serve with meat, fish, tofu, or anything else you can think of.
 

a2254457-2877-46c4-ae48-a06a2b9e16f8.jpg

Fall Fennel Slaw

I love fennel; it’s one of my favorite fall veggies and grows great in our climate. One of the best ways to eat it is raw and whole like an apple. My next favorite way is in this mouth popping salad:

Alternatively, if you're dealing with confirmed fennel hater, convince them to try this: